skip to main |
skip to sidebar
Well, dear readers, here we are at post no. 100. Today I bring you something I've been keeping to myself for almost two months. (Seriously, how is June almost over? Can't we go back to spring? I liked spring. It was pleasant. Stupid summer.)
Daniel and I were at the supermarket, in early May, shortly after I had gotten my first issue of Bon Appétit. We had already decided on avocado quesadillas for dinner - and oh, goodness, looking back at that post makes me want one right now. Mmm, avocado.
Anyway, we were talking about dessert and, well, you know how it goes. You see a recipe, it gets stuck in your head, and you can't think of anything else. That's what this crumb cake did to me. It looked so good, and I could think of nothing else I wanted to make for dessert.
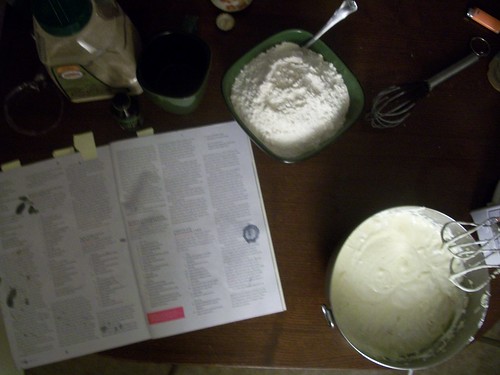
It took two extra trips to the supermarket, which C.T. valiantly took upon himself to do. It also needed to bake for longer than I realized, and made way more cake than I anticipated. What can I say, I hadn't read the recipe that clearly before it got stuck in my head. Luckily, it all turned out for the best: we had cake that night, even though it wasn't until at least 10 pm. Daniel said it tasted like his momma's crumb cake, which is quite a compliment.
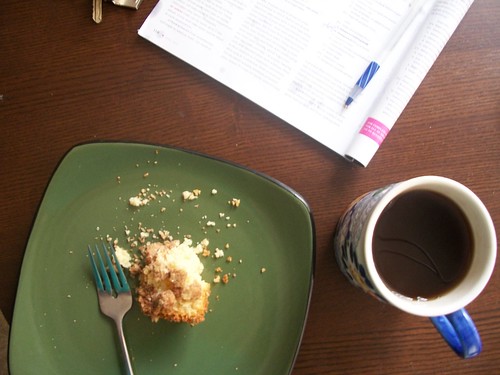
Crumb Cake
adapted from Bon Appétit
Right before making this cake, I had a conversation with the ever-delightful Abbi about the search for a recipe that uses all four sticks of butter that come in a package. This one comes close, with three and a half. Don't let that scare you off, though, because this is kind of amazing.
for crumb topping
1 cup dark brown sugar
1/2 cup white sugar
1 1/2 tbsp cinnamon
1/2 tsp salt
2 sticks butter, melted
2 1/2 cups all-purpose flour
for cake
2 1/2 cups all-purpose flour
2 tbsp baking powder
1/2 tsp salt
1 1/2 sticks butter, room temp.
1 1/2 cups sugar
2 eggs
1 1/3 cups sour cream
1 tsp vanilla extract
First mix the topping: blend the white and dark brown sugars, cinnamon, and salt in a medium bowl. Add in the melted butter; blend. Then add in the flour and stir with a fork until clumps form. (The amount you'll have may be more than you want to use on the cake. I used the extra as an ice cream topping, which is also pretty delicious.)
Preheat the oven to 350°F.
If you have a 13x9 baking pan, grease that. I do not, so I used a 9x9 and a loaf pan. (I realized belatedly how much cake this makes.) Whisk together the flour, baking powder, and salt in a medium bowl. In a large bowl, beat the butter till smooth. You could almost certainly do this by hand, but I used my electric mixer because I was in a hurry. After each addition, beat: sugar (until fluffy), eggs (1 at a time), sour cream and vanilla (just until blended). Add the flour mixture in three groups, beating well after each addition.
Transfer the dough to your baking pan(s), making sure it spreads evenly. Use your hands to clump and spread topping over the cake. There will be a lot of topping, so don't worry when you cover the whole cake. It works best with a lot of the crumble.
Bake the cake for about 1 hour, or until the topping is a deep brown and crispy. Let the cake cool for about 30 minutes.
Serve as dessert or breakfast; it's delicious either way!
Dear readers, it is time for me to admit what may have been obvious for some time: I am severely uninspired right now.
I'm not sure if it's that I've been doing this blog thing for over a year now, or that with the onset of summer I don't particularly want to turn my oven on, or maybe even the fact that this Thursday marks two years since I moved to DC. It's funny to think that two years have passed since I came here with only a duffel bag, relying on the generosity of friends. So much has changed since then.

Cooking is certainly one of those things, but luckily for me, my friends haven't really changed. The ways we interact with each other, sure; our relationships have not been static and continue to grow and change. It's just that underneath that we have a stable foundation. I know that I will be friends with these people for the rest of my life.
So when Daniel called me on a Friday night and said only, "Pot pie," I knew what to do. Well, okay, I knew what to do once we decided whose apartment to cook at (his, since he had all the veggies). It took us a while to actually get started, which meant we ate dinner around nine, but that sort of epitomizes summer, for me.
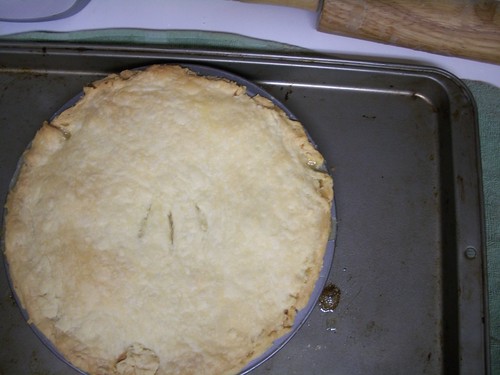
Here is another thing that hasn't changed in these two years in DC: I still get nervous when baking something new. Right up until we started eating, I was fretting that maybe the crust would be awful, or too buttery (I mean, there are two sticks of butter in that thing, which is kind of a lot), or just plain bad. It was not. It was pretty delicious, if I may say so myself. We even had it the next day for lunch.
Rustic Veggie Pot pie
adapted from Ruhlman's Ratio and a couple recipes from Joy of Cooking
for the dough
2 cups all-purpose flour
2 sticks butter
1/4 ice water (approx.)
pinch of salt
for the filling
(all of these should be about the same size)
1 medium-sized potato
carrots
broccoli
1 bag frozen peas
onion
garlic
for the sauce
2 tbsp butter
2 tbsp a-p flour
1 cup milk
1 cup grated cheese (we used cheddar)
Preheat the oven to 325°F.
To make the dough, mix in the butter with the flour in a medium-sized mixing bowl, rubbing it in with your fingers. If you carefully read directions, you would have cold butter cut into small pieces. If you are like me, however, you will make small pieces with your fingers while mixing it in. And the butter will not be as cold as you realize it should be. Even if you are like me, this pie dough will turn out fine. Trust me. You should have pea-sized balls of butter, much like making scones. Slowly add the ice water, just a bit at a time, working the dough just until it comes together. Add the salt and work just a little bit more. Separate the dough into two equal pieces and refrigerate.
Because we're making a potpie, you'll need to blind bake your crust. Take one of the dough balls out of the refrigerator and roll it out. Place the dough in your pie tin, then line with aluminum foil and something to weighted - we used another, smaller pie tin, but you could use pie weights (which are made for this) or dried beans. Bake the crust for about 20 minutes. If you time it right, the other parts of the equation should be ready to go as well.
We did a quick saute of the vegetables, throwing them in based on how long they need to cook. So, in this order: potatoes, broccoli, carrots, peas, onion, garlic. You'll need a pretty big pot (or wok, which is what we used) to contain all of these, or I suppose you could use a couple different ones. Whatever works for you!
For the Mornay sauce, you'll start by making a roux, which just means you will melt the butter in a saucepan, then add in the flour. Stir the roux until it has blended together - this shouldn't take too long. Remove from heat and add in the milk, slowly. Once you add the milk, bring the pan back to a simmer, stirring constantly to prevent lumps from forming. Turn the heat down and slowly add the cheese in, while still stirring. When the cheese has melted, remove from heat.
Roll out the second ball of dough; this will be the top crust. Pour the vegetables into the bottom crust first, then the cheese sauce, and finally top with the crust. Carefully trim the edges of the top crust and make some slits for steam to escape.
Bake for about 30 minutes. Let cool, and enjoy!
Sorry, sorry, obviously I am kind of a failure at this blogging thing sometimes. It's just that life comes up - sometimes Blogger vexes me to no end, or I forget my card reader, or I have to get home, wash dishes, and then scurry to the market to gather a few ingredients for potpie. (Probably you'll read more about that next week.)

The first time I had chocolate mousse, I was about eight or nine, and on a cruise. This cruise also saw my first karaoke, which was with a couple other girls to "It's My Party (And I'll Cry If I Want To)." I blame being nine.
I don't remember much else of the cruise - those two firsts, some nice beaches, and a stop in port where women desperately wanted to braid my hair. This was about the time I went to YMCA summer camp, and hair-wraps were super popular. I may have gotten that done, though my hair was long enough (and uncurled, even longer) that it may have been prohibitively expensive. I certainly got it done at summer camp.
Honestly, though, what I remember most is that chocolate mousse. I think it stood out because it seemed so fancy. It wasn't plain old ice cream, or frozen yogurt, or cake - it was kind of unlike any dessert I had experienced yet. It seemed like the sort of thing that ordinary people couldn't make.
I don't even really like chocolate desserts that much, if I can make that confession. But when I saw the recipe for chocolate mousse on the back of the Ghirardelli wrapper, I made sure to tuck it away. Maybe this was something an ordinary person (namely, me) could make. When I had bought heavy cream for the ice cream that never was, I realized I had to use it for something before it went bad.
So I did.
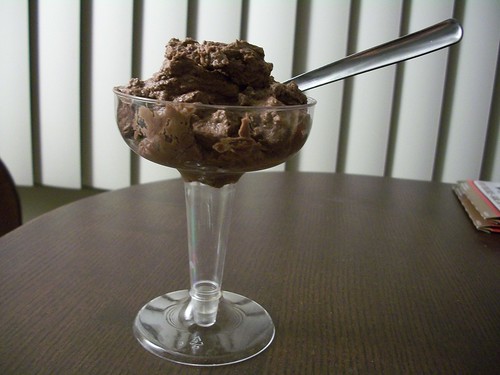
Chocolate Mousse
adapted from Ghirardelli
4 large egg yolks
1/2 c. sugar
2 1/2 c. heavy whipping cream
1 1/2 bars baking chocolate (I used Ghirardelli's 100%), finely chopped
special equipment
hand or stand mixer
Whisk the egg yolks together in a small bowl for about a minute, or until they come together thickly. Slowly add in the sugar, continuing to beat.
Heat up one cup of the cream in a saucepan - you're not going to boil it, just get it hot. This shouldn't take very long, but be careful. Temper the eggs by stirring about half of the cream into the mixture, then add back into the saucepan with the rest of the cream. Cook on low heat, stirring constantly, until the sauce thickens (this should take about five minutes).
Let the mixture cool for ten minutes, then blend in the chocolate. Cover and refrigerate for two hours.
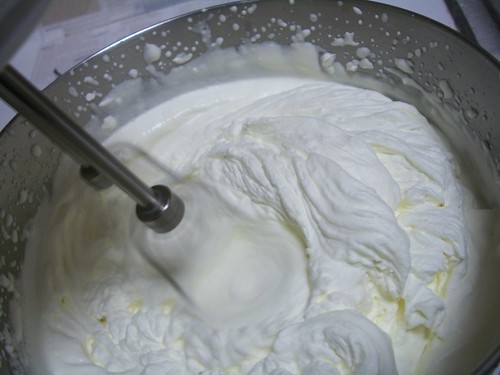
About fifteen minutes before the two hours is up, throw a medium bowl in the fridge to chill. When that's chilled, use a mixer to beat on high the remainder of the cream (1 1/2 cups), producing - ta-da! - whipped cream. (Usually I am all for doing things by hand, because I hate pulling out the mixer and then cleaning it, but honestly, it is super hard to, uh, whip by hand. You can certainly try, but it will take approximately forever.) The cream should be thick but airy and using the mixer, it will only take a couple minutes on high to produce.
Gently mix about half of the whipped cream into the chocolate mixture, until blended. Carefully fold in the rest of the cream until that too has been incorporated into the mixture.
This makes an awful lot of mousse, so be sure to invite some people over to foist it on!
Well, dear reader, I don't have a recipe quite ready for you today, so I thought I'd do a little switcheroo and have that for you on Friday, and photos today! Wacky!


I've been meaning to tell you about these for a while. I had planned to give them to you as part of the one-year celebration, but instead you got a May Day meal. I felt pretty good about that.
I wanted to make ice cream this past weekend. Theoretically, at least. The idea of making (and then having) homemade ice cream was pretty appealing. But Saturday rolled around and my day was spent writing things down, my evening with friends. Then Sunday came, feeling more like a Saturday in the three-day-weekend, and C.T., Daniel, and I were sitting in my apartment.
I brought up ice cream, but then didn't really feel like making it. "Guys," I said, "I don't know what I'm going to bake for my blog."
But then! Inspiration! What better for a Memorial Day celebration than cheesecake? (Honestly, what situation is not improved by cheesecake?) So we took a little field trip to get caffeine (some of us may be addicted) and pick up the ingredients I didn't already have.
I did already have the tiny mason jars, mostly because a couple months ago Daniel sent me a link to one-serving pies in half-pint jars. Clearly I needed to make one-serving cheesecakes. Like I said, what situation is not improved by cheesecake? What is particularly great about the mason jar servings is that you can freeze them and bring them out whenever you want. It's kind of perfect for someone who, oh, I don't know, usually bakes in fairly small quantities, usually for herself and her friends.
And if I may brag a little, these little cheesecakes are good enough to inspire conversations about taking them to market. They hit just the right spot on a hot and humid summer day.
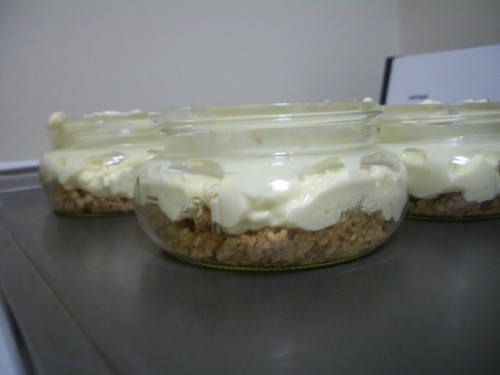
Mason Jar Cheesecake
for the crust
1 cup graham cracker crumbs
1 tbsp sugar
4 tbsp melted butter
for the filling
16 oz cream cheese, room temp.
1/2 cup sugar
1/2 cup sour cream, room temp.
1 tbsp flour
1 tsp vanilla extract
1 egg
special equipment
4 half-pint mason jars, washed
Preheat the oven to 325°F. Mix together the graham cracker crumbs, 1 tablespoon of sugar, and the melted butter. Press the mixture into the bottom of the mason jars. Place the mason jars on a baking sheet and bake for 10 minutes.
While the crust is baking, beat the cream cheese and sugar together until blended. Then add in the sugar, flour, and vanilla. Next beat in the sour cream. (I did all this with a wooden spoon and there were still some chunks. This is okay! You just wind up with a more rustic cheesecake. It's still delicious.) Finally mix in the egg until blended. Pour into the mason jars, over the now-baked crust.
Put the mason jars (on baking sheet) back into the oven for about 40 more minutes. When done, let cool for about ten minutes and then carefully screw on the lids to the mason jars. You can now freeze them, if you're not going to eat them soon, or just refrigerate overnight.


