skip to main |
skip to sidebar
This roll was pretty much a bust, but I am into these two.


It is a well-known fact that I like cheese and that I like quick breads. After all, the very first food post I made here was about cheese scones.
So when I saw a recipe for cheesy popovers, I was intrigued. I didn't really know what popovers were, but they sounded easy enough. Months passed, though, before I got around to attempting them.

You may remember that attempt. It was not exactly a success, though unlike some other kitchen failures, it was edible. And then like a crazy person, I tried again the next night. Still nothing.
I wasn't ready to give up on these yet, though. So I went to the source: Joy of Cooking. It's only steered me wrong once, and I can forgive it that. Their recipe laid it all out: no peeking. None. Not even a little bit. It had specific baking times. I mean, come on, it's one of the most famous cookbooks for a reason.

That is what I am talking about! Look at that! Popping! That, dear reader, is a baking victory. And those always feel good. (Yeah, those ones in the front of the picture did not pop. I got ambitious in the amount of popovers I tried to make. As it turns out, you cannot make an entire muffin tin's worth with this batter. C'est la vie.)
I wanted to make sure, though, that it wasn't just a fluke. So I made them again, and sure enough, they popped. Here is the key, though: no peeking!
Parmesan & Thyme Popovers
idea from White on Rice Couple, recipe adapted from Joy of Cooking
1 c. milk
1 tbsp melted butter
1 c. all-purpose flour
1/4 tsp salt
2 large eggs
1 tbsp thyme
1/2 cup Parmesan cheese
Preheat oven to 450°F. Grease a muffin tin.
In a medium bowl, mix together the milk, butter, flour, and salt. Be careful not to over-mix; it should just start blending together. Beat in the eggs one at a time, again being careful not to over-beat. Stir in the thyme. The mixture at this point should not be too thick.
Drop 1 tablespoon of the batter into half the spaces on a regular muffin tin. (This makes eight popovers - though if you prefer or want smaller popovers, you could eke out twelve.) Sprinkle the cheese on top of the batter, distributing evenly, then top off with the rest of the batter.
Bake for 15 minutes. At this point, turn the temperature down to 350°F and bake for another 20 minutes. And this part is important: do not peek. Seriously. It will bring you nothing but heartache and unpopped popovers.
Serve warm.
(But don't listen to them when they say they are only good hot. I accidentally left the tin out while I hung out with Daniel for the afternoon, and came back and, um, ate them all. They were delicious.)
I know I said I would update you on the lunchability of the quesadillas, and let me tell you: it is high. If I were grading it, I would give microwaving them for lunch about a B. Next time I think I'll try the toaster oven in the office kitchen.
And now, two favorites from my latest roll:


Well, dear reader, I have looked at this blank screen for a while and still I'm not entirely certain what to say. I mean, don't get me wrong, I have a nice little recipe for you, but I seem to have been taken over by writer's block.
And honestly, writer's block may or may not be a real thing, as the wonderful Marion Roach says. In my case, it may simply be a rearranging of priorities: I have been focusing on fiction-writing lately. Of course, here I am, writing about not-writing, so the point may be moot.
Here is the thing: I like simple food. Especially on weekdays, when I am tired from work and do not especially feel like preparing an elaborate meal for one. Lately, though, I started reading The Kitchn blog, which has been doing a whole segment on "three square meals" - which has got me thinking about things. I bought a bunch of bananas (for a dollar! How are bananas so cheap?) to have for breakfast. And I stumbled upon this genius idea during lunch week: freezing quesadillas for lunch.
I think you can guess what had to be done.
Unfortunately I won't be able to tell you if they make for a good lunch, since I will be having lunch with the boys. I'll update you tomorrow.

I can tell you this, however: these are delicious. As in, when I was done eating them for dinner, I was daydreaming about eating them for lunch. They are seriously good.
Black Bean Quesadillas
beans adapted from Orangette
cheddar cheese
tortillas
olive oil
1/4 large yellow onion
1/2 tsp cumin
1 tsp oregano
1 (heaping) tsp hot sauce*
1 garlic clove
1 can black beans
* This makes for very mild beans, though I admit I may be biased, thanks to Daniel. I even added more than this, and it wasn't spicy enough. So use your judgement!
Grate some cheese (I used cheddar, but feel free to use whatever you prefer!) and set it aside in the refrigerator. Dice the onion, as finely as you want chunks in the beans.
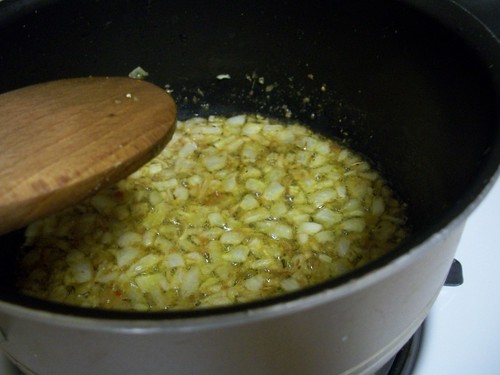
Pour enough olive oil into a saucepan to cover the bottom. Warm the oil on medium heat, then toss the onions in. Cook them for a while, until they are beginning to caramelize. Then it is really just a matter of tossing and stirring well after each addition: the cumin and oregano, hot sauce, garlic, then the beans and the can-juice. Reduce the heat a little and cook until the beans are warm and soft. Add salt (or additional hot sauce) as needed. (I used the Whole Foods brand black beans, and they were ready in no time at all.)
Turn the heat off and set the pan of beans aside. Grab a skillet, the tortillas, and the cheese out of the fridge. Set up your quesadilla-making station. (It really does help to have everything set up, so you can make as many as you want smoothly.) With these, it's best to keep the cheese to one side and the beans to the other. It's good to keep the beans not too close to the edge, or they'll spill out when you flip the quesadilla.
I was so excited about it being Friday on Friday that I forgot all about this! So, here, have some more spring (I am trying to enjoy it before summer descends with its awful heat):

Hello there, dear readers. It feels like it's been a while. It's only been a week since I really wrote here last, and two since I shared a recipe, but it feels longer. Time! It is a pretty crazy thing!
Time has sort of been wigging me out lately. April has never been a good month for me, and this year April is the month before two years since I graduated from college. It hardly seems possible. I am still in an office job (albeit a better office job than I had before), still living a life against which I had railed so hard. I have unwittingly become a part of those mass of men that Thoreau talked about.

Baking helps. Watching ingredients react with each other, slowly become dough, is a kind of magic. A very domestic magic, but still. Over the past year I have only gotten better at it. I only mean to toot my own horn a little, and let me tell you, it's better than the alternative, which is me moping.
It's easy to mope. This is not how I saw my life, ever. Two years out of college, and in an office, not back in school, not doing something related to my majors. It is harder to be grateful. The rejection letters from grad school propelled me to DC, where I may not have found the ideal job but I did find amazing people. I found within myself a love for baking.

It is harder to be grateful, but better. I am trying to keep this in mind, especially during this time when everything is changing.
And besides, if I hadn't come to DC, I might never have made these biscuits.

Biscuits
adapted from Smitten Kitchen
2 c. all-purpose flour
1 tbsp baking powder
1/2 tsp salt
1 tbsp sugar
1 1/2 c. heavy cream
3 tbsp melted butter
Preheat oven to 425F.
Whisk dry ingredients together in a large bowl. Melt butter and set aside. (I just put the butter in a small oven-safe dish and popped it in the oven for a couple minutes. Easy!)
Fold the cream into the dry ingredients. The dough may be a little crumbly, and that's okay. Because next you're going to turn it onto a floured surface and mold it into a round, flattening it to about 3/4 inch. Cut into rounds, about 2 inches in diameter. (I don't have a biscuit cutter or anything, so I just used a whiskey glass. See picture above.)
Place the cut-outs on a lined baking sheet (with parchment paper or a Silpat). Brush the melted butter on the tops of the biscuits-to-be.
Bake for 15 minutes, until golden.
Note: These are best served hot, but they also make for a delightful little breakfast the next morning. I like to make a sanwich out of them. Enjoy!
So, uh, I love film, as you can probably tell, but this is the first polaroid I've posted! Probably because I don't have a scanner, and taking a photo of polas does not usually turn out well.

It's hard for me to say this, but I've got to: I, um, don't have a recipe for you today. I know, I know. I wanted to get that out of the way first.
I've been trying this new thing, where I make a recipe at least a couple times before throwing it up here. I used to just be so excited that something worked pretty much 100% that I would post it no problem. But I keep doing more and more complicated things, or at least things that do not necessarily work out on the first try.
So instead, here is a peek on what I am working on perfecting:
That's right. Popovers. Still. I am determined to get these right. I'm pretty close. At least they are popping now, right? Right.

Um, single-serving cheesecakes in tiny mason jars. What else can I say?
So next week I should hopefully have a recipe for you. Unless this heat wave kills me first.
In the spirit of last Easter, a photo of friends at a monument. (Also, I am really into this Diana Mini. Like, two rolls in as many weeks into it.)


