Showing posts with label sweets. Show all posts

9.06.2011

between the table and the kitchen

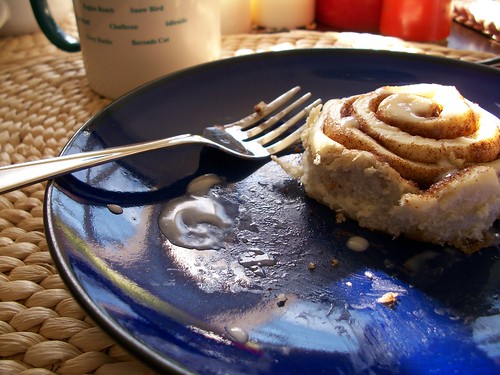
I don't remember when, exactly, it happened, but around the end of July I found a recipe for vegan cinnamon rolls. I mentioned this, casually I'm sure, to Daniel, who pounced on the idea. I made cinnamon rolls for Christmas a few years ago, and they were (if I may say so) pretty damn good. I was excited to find a recipe that was not only vegan but also mentioned Cinnabon in the post.

An aside: when I was young, my mother and I would go on shopping days, and we would almost always get a roll or two from Cinnabon in the morning. In college, far from my mother, I recruited one of my best friends to go on Cinnabon expeditions with me. I have similar fond memories of meatballs subs from even younger days at the mall in New York.

Anyway. I was excited, Daniel was excited, I bought all the necessary ingredients. Let me remind you: this was the end of July, maybe the beginning of August. I did not make them. I kept on not making them, for various reasons. I started a new job, so I didn't want to use my precious weeknights for such a time-intensive project. I was tired. I didn't want to be stranded by myself in the kitchen for such a long duration.

It's like I had forgotten how much I love baking.

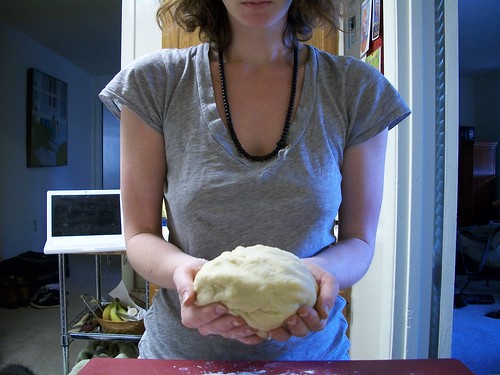
So when Daniel suggested I start making the dough while he made dinner on Sunday night, and I felt myself warm up to the idea, I made myself do it. I ran back and forth between the table and the kitchen, with its woeful lack of counter space, proofing yeast and melting margarine and measuring flour. As soon as I had the dough in my hands, I remembered. I remembered how much I love making food, how much I love baking in particular.

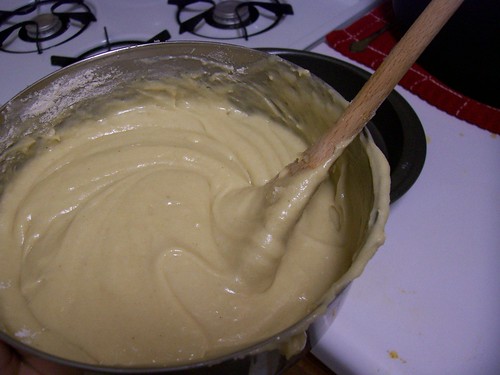
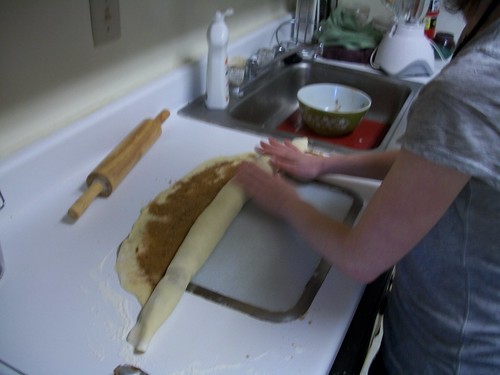
We ate dinner while the dough was rising, and Michael came over to hang out. He and Daniel sat around in the living room while I flattened the dough into a rectangle, melted more butter, spread the cinnamon-sugar over the melted butter. I filled pans full of a melted butter and sugar mixture. I waved off the offers to help and finally I rolled the dough and cut it, filling three different pans full of rolls. Then into the refrigerator and onto washing some of the mountain of dishes I had made.

The next morning I slept in a little, still waking before Daniel, and tried to quietly pad around the apartment until it was time to put the rolls in the oven. It was a great way to start the holiday.
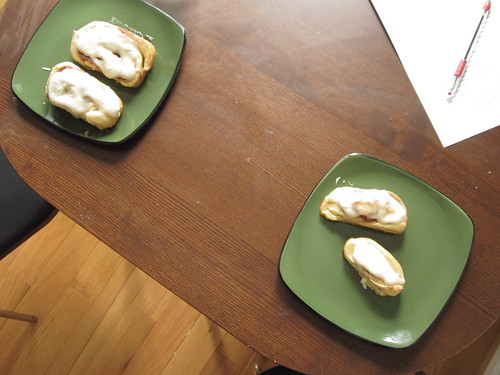


Vegan Cinnamon Rolls
Here at VeganYumYum

A note: heed the warning not to add liquid to the icing. It does, in fact, come together with a lot of elbow grease.

10.26.2010

eat more pie

I do this thing, when I make a new dish, where I get really nervous it won't work out and then try to lower everyone's expectations regarding the dish. I start to fret, and then I voice my concerns, which are usually just "what if I messed something up."

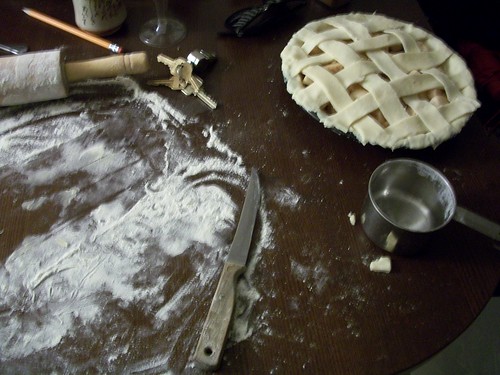
After a trip to Pennsylvania, I came home with a bag full of apples, from the orchard next door to my grandparents' new (-ish) house. Pie was the obvious solution, but I am - confession time - not a big fan of pie. (Pumpkin pie is the exception. I love pumpkin pie so much.) I forget sometimes that other people kind of love pie. So when I asked Daniel if he wanted some of the pie I was planning on making, he answered, "Obviously," and I felt a little sheepish.


I'm not sure why I never got that into pie. I think it was something like raw fruits were fine, why would you bake them into a pastry? I know, I know. That's a weird thing to think. I recognize that.

Maybe it just took baking one myself. Because seriously, despite all that above, I kind of loved this pie. I stood in the kitchen eating pie out of the pan. Just a tiny slice, to see if it passed. Fresh from the oven. I served Daniel and Michael and hurried back to eat more pie.

The pie was gone by the end of the night.


Vegan Apple Pie
adapted from Ratio, by Michael Ruhlman

One of the best things about this pie is that it really highlights the apples. You know, like it should. The crust wasn't sweetened, in a serendipitous mistake. As Daniel said, "it's not like a sugar-punch to the face." It won over Michael, who is also not a big fan of pies. All in all, a winner.

Also, if you're not making this for a vegan audience, you can happily use butter. It should be noted, however, that I've made it both ways and I could not tell you which was more delicious.


3 medium-to-large apples
2 tbsp sugar
cinnamon
1 1/2 c. all-purpose flour
2 sticks margarine, cold or frozen
1/2 c. ice water
pinch of salt

Peel and chop your apples. I like to have small, bite-sized pieces in my pie, but feel free to chop to whatever size you desire! Place them in a medium-sized bowl and toss in the sugar and a couple shakes of cinnamon. Mix with your hands and let sit while you make the dough.

Measure out the flour into a large mixing bowl. Cut the butter into small pats and rub into the flour until you have even smaller pea-sized pieces. Slowly add in water until the mixture starts to become dough-like. Make sure not to overwork the dough - knead it just until it comes together. Split the dough into two.

Preheat the oven to 350°F.

On a floured surface, roll out one chunk of dough. This will be your bottom crust. Go ahead and place the rolled out dough into your pie pan and remove the excess dough around the edges. Put the filling inside. Now comes the fun part: you can choose what kind of top crust you want. You could simply roll out the other chunk and have a plain crust (making sure to make some slits for the steam to escape), or you can make a lattice crust, which is what I did. For that, roll out the second chunk of dough - I did this a little at a time, so I didn't overwork the excess dough. Using a knife or a pastry cutter, cut some slices of dough. Place them on top of the filling, weaving them as you go.

When you're done, place the pie in the oven and bake until the crust is golden and flaky.

9.21.2010

starting to change

Change is on my mind a lot, lately. It's autumn, first of all, so even though the forecast for tomorrow is 90F (ugh), the breeze is still cool and the leaves are starting to change. Autumn is a good season for change, after all - but then again, what season isn't?

There are plenty of changes happening within my circle of friends, but the one that concerns this post is really Daniel's veganism. See, I have long had plans for making ice cream. These plans have never really come into fruition for one reason or another (usually my own laziness, let's be honest) - and technically they still haven't.

I found the recipe below on a blog I read regularly, and promptly sent it to Daniel, figuring he'd be interested in it. And he was, along with the suggestion that around this we create an elaborate vegan meal. This meal was to include plantain empanadas with refried beans, chipotle mashed potatoes, and some sort of stir fry.


Well, dear readers, there's a reason you're not reading about any of those today. I mean, they were all fine - and the latter two were certainly very spicy - but the empanadas, which were the most complicated, aren't really worth the complications. They basically caused Daniel and I to swear off baking with plantains, especially after they nearly destroyed my (tiny, granted) food processor and actually destroyed one of my spatulas with the frying.

(Note: the chipotle mashed potatoes were pretty awesome. To make these, simply make mashed potatoes and then stir in as much of a can of chipotle peppers as you'd like. Easy!)


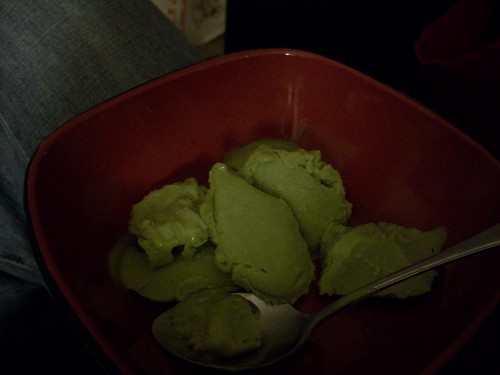
The dessert, though - that turned out pretty much perfectly. Granted, it is a little weird: all the flavors go together, but the fact that it's frozen is just, well, weird. Don't let that stop you from trying this, however, because it's still quite tasty!

Avocado Ice Cream

Recipe

8.31.2010

a funny bias

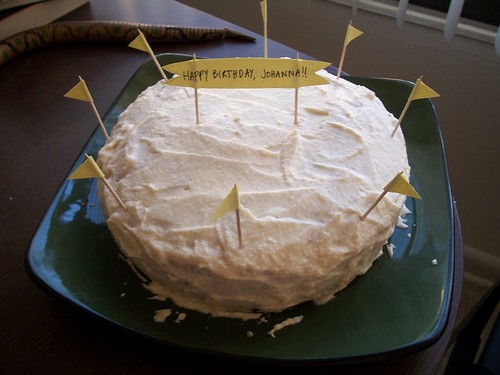
Last week, Daniel asked me if I could bake a cake for Jo's birthday party. Which, you know, is not a huge deal. I could bake a cake in my sleep. But then he asked if it could involve sweet potatoes.

This was a surprising request, because, well, I had no idea that cakes could involve sweet potatoes. A quick google search told me that yes, that is a thing. Daniel even went so far as to provide a recipe, which was vegan. (Daniel's new-found veganism might mean you will see more vegan recipes on here. It might not. Y'all know how much I love butter.)


There is a funny bias against vegan baked goods. By and large this is changing, with the popularity of places like Babycakes up in New York, but it still exists. People don't expect vegan baked goods to be delicious and moist like non-vegan baked goods.

So I was nervous. I've never baked consciously vegan before (though now I have a label for any vegan goodies on here [note: some of the items on that page do have butter, but as it's for sauteing, you can substitute for olive oil]), on top of which I always get nervous when I bake something new. And on top of all of that, I was bringing this to a party where many people I did not know would be partaking of this baked good.


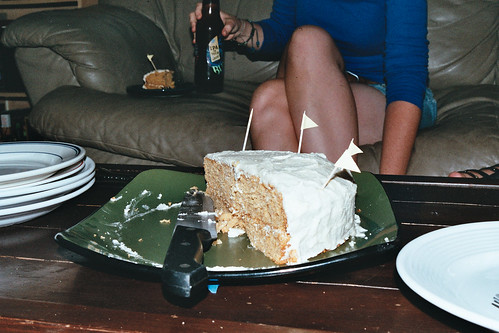
All my nerves, as usual, were for naught. I iced and decorated the cake (okay, that part I was actually excited about) and jerry-rigged a carrying case out of a plate and tin foil. When I unveiled it, before most of the guests arrived, those in attendance seemed impressed with just the description of what it was. Once the cake was cut and served, people incredulously asked, you made this? The most impressive victory was over those who are most certainly not-vegan; John Paul noted that usually vegan baked goods are dry and not-so-good, but this was moist and delicious.

So there you have it. This is a vegan cake to win over non-vegans. It's a little bit more work than I usually like in a cake, but it's worth it, especially if you want to be able to serve those of your friends who don't partake of dairy.


Sweet Potato Cake with Almond Milk Icing
adapted heavily from here

for the cake
3 cups all-purpose flour
1 1/4 cups sugar
3 tbsp baking powder
2 tsp cinnamon
1 1/2 tsp ginger
3/4 tsp nutmeg
1/2 tsp salt
1 (15 oz.) can sweet potato puree OR 2 medium sweet potatoes
1 cup water
1/4 cup vegetable oil (I used canola)
2 tbsp apple cider vinegar
2 tsp vanilla

for the icing
2/3 cup margarine
4 cups powdered sugar
1/4 cup almond milk
2 tsp vanilla


If you, like me, cannot find sweet potato puree and are using sweet potatoes, chop them up in fairly small pieces, bring some water to boil in a large pot, and let them sit in there until they fall apart effortlessly.

While that is happening, or if you were lucky enough to find a can of puree, mix together in a large bowl the dry ingredients: flour, sugar, baking powder, cinnamon, ginger, nutmeg, and salt.

Preheat the oven to 350°F.

When the potatoes are falling apart, beat them into a puree, either by hand or with a mixer (because I was short on time, I used a mixer). Add the wet ingredients to the mix: puree, water, oil, apple cider vinegar, and vanilla. Stir well and divide the batter between two cake pans. I used nine-inch pans, but feel free to use whatever you have, depending on the type of cake you want.

Bake for about 30 minutes, or until a toothpick/knife comes out clean. I allowed my cakes to cool overnight, but they need to be completely cool before you ice them. The original recipe recommends 15 minutes in the pan, then 10 minutes on a wire rack.

For the icing, beat the margarine with a mixer for about 30 seconds, then add in the milk. Feel free to add the vanilla at this point; the recipe calls for 2 teaspoons, but I just eyeballed it. While mixing, slowly add in the powdered sugar. Please note that you might not need all 4 cups of powdered sugar. I only measured out three and barely used all of it. How much you use depends on what consistency you want as well as how sweet you would like the icing to be.

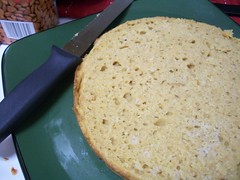
Now for the tricky part: creating the layers. Using a large knife, slice the top off of one of the cakes. This will make the cake more solid and steady, which you will appreciate later, trust me. An illustration:


Once you've done that, spread the icing on the top of the bottom layer. Carefully place the other layer on top, and continue icing. Decorate if you'd like, or serve and enjoy!

6.15.2010

seemed so fancy

Sorry, sorry, obviously I am kind of a failure at this blogging thing sometimes. It's just that life comes up - sometimes Blogger vexes me to no end, or I forget my card reader, or I have to get home, wash dishes, and then scurry to the market to gather a few ingredients for potpie. (Probably you'll read more about that next week.)


The first time I had chocolate mousse, I was about eight or nine, and on a cruise. This cruise also saw my first karaoke, which was with a couple other girls to "It's My Party (And I'll Cry If I Want To)." I blame being nine.

I don't remember much else of the cruise - those two firsts, some nice beaches, and a stop in port where women desperately wanted to braid my hair. This was about the time I went to YMCA summer camp, and hair-wraps were super popular. I may have gotten that done, though my hair was long enough (and uncurled, even longer) that it may have been prohibitively expensive. I certainly got it done at summer camp.


Honestly, though, what I remember most is that chocolate mousse. I think it stood out because it seemed so fancy. It wasn't plain old ice cream, or frozen yogurt, or cake - it was kind of unlike any dessert I had experienced yet. It seemed like the sort of thing that ordinary people couldn't make.

I don't even really like chocolate desserts that much, if I can make that confession. But when I saw the recipe for chocolate mousse on the back of the Ghirardelli wrapper, I made sure to tuck it away. Maybe this was something an ordinary person (namely, me) could make. When I had bought heavy cream for the ice cream that never was, I realized I had to use it for something before it went bad.

So I did.


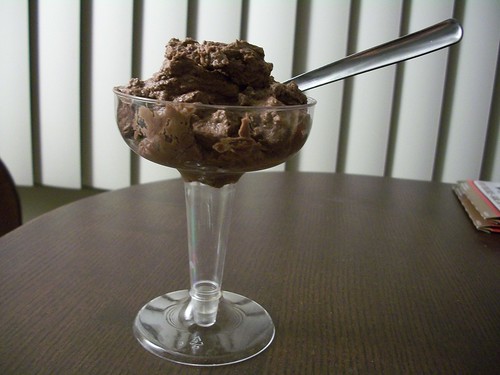
Chocolate Mousse
adapted from Ghirardelli

4 large egg yolks
1/2 c. sugar
2 1/2 c. heavy whipping cream
1 1/2 bars baking chocolate (I used Ghirardelli's 100%), finely chopped

special equipment
hand or stand mixer

Whisk the egg yolks together in a small bowl for about a minute, or until they come together thickly. Slowly add in the sugar, continuing to beat.

Heat up one cup of the cream in a saucepan - you're not going to boil it, just get it hot. This shouldn't take very long, but be careful. Temper the eggs by stirring about half of the cream into the mixture, then add back into the saucepan with the rest of the cream. Cook on low heat, stirring constantly, until the sauce thickens (this should take about five minutes).

Let the mixture cool for ten minutes, then blend in the chocolate. Cover and refrigerate for two hours.

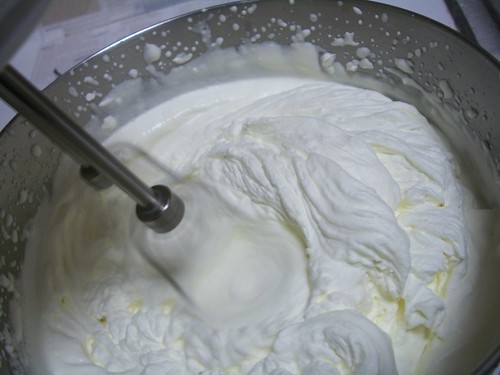
About fifteen minutes before the two hours is up, throw a medium bowl in the fridge to chill. When that's chilled, use a mixer to beat on high the remainder of the cream (1 1/2 cups), producing - ta-da! - whipped cream. (Usually I am all for doing things by hand, because I hate pulling out the mixer and then cleaning it, but honestly, it is super hard to, uh, whip by hand. You can certainly try, but it will take approximately forever.) The cream should be thick but airy and using the mixer, it will only take a couple minutes on high to produce.

Gently mix about half of the whipped cream into the chocolate mixture, until blended. Carefully fold in the rest of the cream until that too has been incorporated into the mixture.

This makes an awful lot of mousse, so be sure to invite some people over to foist it on!

5.04.2010

still unaware

It's been a year, dear readers!

Well, just about, anyway. A year ago tomorrow I made my very first post here. I had just started getting into cooking, still unaware of the hold it would get on me. I had no idea how much I would love kneading dough and pouring batter. I had no idea I would read a book on cooking ratios in a night.


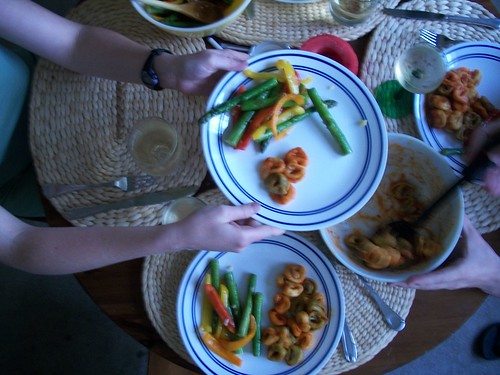
A year ago I never imagined Daniel and I would be cooking fancy meals together, much less that we would go into the supermarket and buy what we needed with our good looks. I mean, that we would go into the supermarket without a plan, and make up a menu as we went.

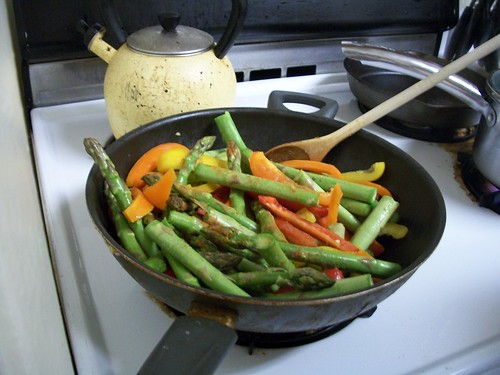
It started with that pinnacle of spring produce, asparagus, to which we added a variety of colorful bell peppers. Dessert also came together in the produce section; first we thought dessert should just be a simple bowl of fruit. Me being me, of course, I saw little dessert cups and got inspired.


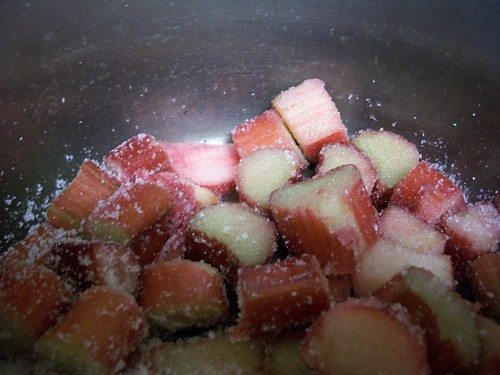
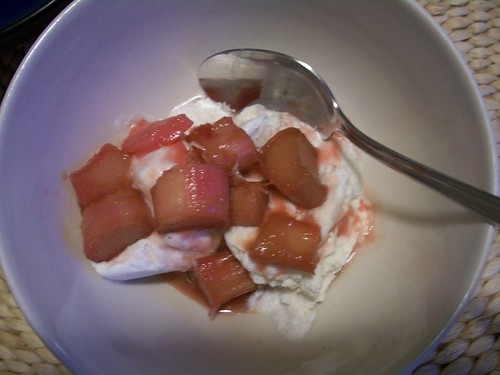
I've been wanting to cook with rhubarb, the darling of food bloggers everywhere, for some time. We had already grabbed some strawberries, so, really, how could I resist the pinkish stalks of rhubarb? I had no plan, just the knowledge that strawberry-rhubarb is a classic combination.

We kept everything a secret from our fellow diners until serving time, so forgive me if, um, I keep some secrets for a little bit. (Though my pictures may give it away.)

My favorite high school teacher, Doc, once told our AP Language class that "every meal is a communion." He was talking about literature, of course, and how everything an author chooses to include in the narrative should have importance - hence every meal being shown having the importance of Communion. The same is true in life, though, or at least has the possibility to be true.


It took a while for me to get from that statement to actually preparing and eating a homemade meal with friends (though college potlucks came close, even with their boxed macaroni and cheese). And let's face it, friends are why I do this. I don't imagine that any more than a few readers are people I don't know. But there are only a few people I'm able to cook and bake for, because of distance, so this is a nice way to share my newfound love of baking with them, too.

Don't get me wrong, our entire meal was not homemade. We bought local, fresh pasta and tweaked some of Newman's Bombolina sauce to go with it. (We made it spicier, obviously.) I did not make the ice cream - though that's on my list of things to challenge myself with. That's not the point. The point is making delicious food and sharing it with friends.


Asparagus with Peppers, Cumin, and Cayenne

There aren't a lot of amounts here, I know, and that's partially because Daniel made this (and isn't online to chat about how much he used) and partially because a lot of this is to taste. For instance, we are really serious about garlic. I think I minced half a head of garlic.

1 bunch asparagus
3 bell peppers (red, orange, yellow)
butter
garlic
cumin, to taste
cayenne, to taste

Chop all of the asparagus in half, making sure to also cut off the ends. Then chop all of the peppers into comparable slices. Mince garlic - as much as you want!

Start sauteeing the asparagus in butter. After a few minutes, add in the bell peppers. When the vegetables are nearly done, throw in the garlic and season to taste. Keep sauteeing for a few minutes more.


Rhubarb Compote
cribbed from Bon Appetit

You could eat this plain and I'm sure it would be good, but really, you owe it to yourself to pour it over some vanilla ice cream. It's kind of perfect. I've also seen similar dishes with ricotta cheese or yogurt. But really, who can pass up ice cream?

1/2 lb rhubarb
1/4 c sugar
1 tbsp butter
1 tbsp vanilla extract

Cut the rhubarb into 1/2-inch slices or chunks. Toss in a saucepan with the sugar. Add butter and vanilla. Stir over medium heat until sugar dissolves, then cover and let simmer until rhubarb is tender. (Don't forget to stir occasionally while it simmers.) Transfer to a bowl and chill for about 2 hours.

Serves 4 perfectly, when served over ice cream.

3.22.2010

take two

I am happy to report that the official onset of spring(!) also ushers in the fact that I can bake with chocolate.

It was the best sort of weekend, the sort that makes you feel kind of invincible. (Especially compared to the weekend before that, which was good but left me feeling more vulnerable than invincible.) It was a weekend of no jackets, not even at night, of playing outside, of new cameras. I photographed the hell out of this weekend.


Sundays have been, historically, not great days for me. I get sad about the end of the weekend, the start of another five days in a cubicle. Lately I have been trying to remedy this melancholy, to find ways to brighten up my Sundays. Sometimes it is as simple as remembering that I do, in fact, like time to myself. This particular Sunday I filled with a trip to the library, watching a couple episodes of Rome, and reading Superman: Red Son. (Which is seriously amazing - even if you don't think you like comics, you might like this.)

And so when I sat down to figure out what my Baking Project was going to be, I was feeling pretty good when I arrived at the bookmarked and dogeared pages for brownie recipes. Despite what happened the last time I attempted brownies, I decided to give it another go.


This time, dear reader, it was a smashing success. Granted, I used a different recipe - and, let's be honest, better chocolate - but still, the victory felt pretty good. Every great weekend should end in delicious baked goods.

Moosewood Fudge Brownies
adapted from Moosewood Restaurant Cooks at Home

A note on the chocolate: I used Ghiradelli's 100% cacao baking bar, and it worked like a charm. Next time I might either use a bar with less cacao or up the sugar a little bit, but honestly, these are great as they are.

1/2 cup (1 stick) unsalted butter
3 oz. unsweetened chocolate
1 cup brown sugar
1/2 tsp vanilla extract
2 eggs
1/2 cup all-purpose flour

Preheat oven to 350F. Grease an 8-inch square pan. (The original recipe says 8- or 9-inch, but my brownies were already pretty thin in an 8-inch pan. Use your discretion!)

Melt the butter and chocolate together - I use the double-boiler method, except my "double-boiler" is a mixing bowl situated on a pot of barely-simmering water, but if you have a microwave, that is also an option! While they're melting, beat the eggs separately in a small bowl.

When the butter and chocolate have melted together, remove from heat. Add in the brown sugar and vanilla, mixing completely. Repeat with the eggs. Then add in the flour and blend.

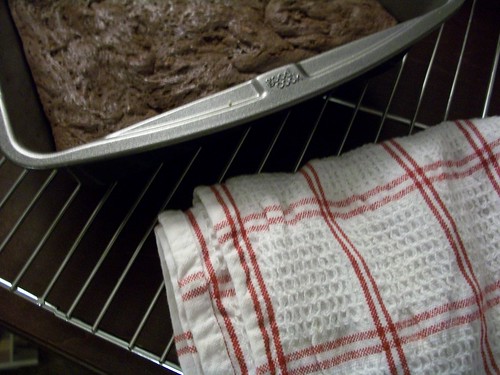
Pour the batter into the pan; bake for about 25 minutes. The brownies should start to pull away from the sides of the pan and a knife should come out clean.

Serve warm with ice cream. Seriously. You will thank me. (These also keep in the fridge for a few days, but take the time to set the oven to 300F and warm them for a few minutes. Mmmm.)

3.02.2010

why court disaster

Sometimes I think the best cooking projects come from realizing certain ingredients are about to go bad. So when I came back from Texas and saw that my milk had a matter of days left in it, I had two choices: one, go to Safeway and buy Oreos, or two, make something. And as tempting as that first option is, I really don't need to eat an entire package of Oreos.

Then, of course, the question was: what to make? It was Saturday morning, before the supermarket, before I was heading over to hang out with friends. I figured cookies would be good, something small and easily transportable. Which is when I realized I still had mini baking cups from the
peanut butter cups.


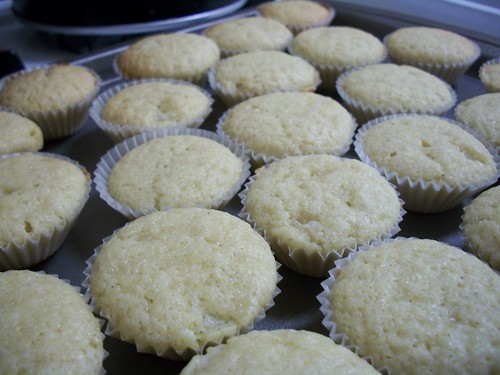
I thought, maybe I would try my hand at chocolate cake again, but in tiny cupcake form. But then again, why court disaster? I knew exactly what I would do: make my go-to cake, but fill up these tiny baking cups. More easily transported than a whole cake, and with the benefit of no one having to commit to a whole slice of cake! Perfect. I traipsed off to the supermarket, and then set to work.

I've talked about
cake before - and this cake, specifically. It's become my go-to cake, one that I barely need to look at the recipe for, one that I know will come out perfectly, one that I often bring over to the houses of friends. This cake works well both as dessert and as breakfast. I leave it unfrosted, because honestly this cake does not need frosting. (Daniel is always trying to get me to make some sort of almond icing for it. I might try that one of these days.)


So I made up the dough, filled dozens of cups, and slipped them into the oven. They found a nice little home in a basket I had sitting around, coupled with a dishcloth to guard against the cold. It was pretty much the most adorable thing. Once we arrived at our destination, the cupcakes were pretty much decimated. Something about making that cake bite-sized turned it irresistible. I got my first "you should sell these!" comment, which was pretty flattering.


Busy-Day Cupcakes
adapted from Orangette

These are perfect to bring to a party, or a potluck, or any place where a group of people will be hanging out. When I brought these to my friends, they couldn't help gobbling them up, creating little mountains of wrappers next to them.

1 stick unsalted butter, room temp.
1 1/3 c. sugar
3 large eggs
2 tsp vanilla extract
2 c. all-purpose flour
2 1/2 tsp baking powder
1/4 tsp salt
3 shakes cinnamon
1/2 c. whole milk, room temp.

Preheat oven to 375°F. If you like to be prepared, go ahead and cover a baking sheet with mini baking cups.

In a large bowl, cream the butter and sugar together. If you are doing this by hand with a wooden spoon (which I recommend, though it is more work) and it is a little nubbly with butter, that's okay. You'll be doing more blending and whatever butter nubbins are left will melt when baked. Add one egg at a time, mixing well after each. Add vanilla extract and blend.

In a medium bowl, combine the flour, baking powder, salt, and cinnamon.

Add about a fourth of the dry mixture to the wet ingredients and beat until blended. Add a third of the milk and blend. Repeat three times, so it'll go: flour, milk, flour, milk, flour.

Spoon the batter into the baking cups and put into the oven. Bake for about 15-20 minutes.

These are best warm, but if you manage to have some leftovers, they'll keep for a few days at room temperature, and make a delicious breakfast.

12.29.2009

fifty

Before I get to the heart of this post, I'd like to mention that this is my fiftieth post here and thank all of you readers for following along in my adventures in the kitchen. Yay!


One of the hardest things about growing up, especially during the holidays, is negotiating what to carry with you from childhood and what to make anew. This is the second year I've spent Christmas away from my family - and I've been lucky enough to have my friend's family to take me in for the holidays. It's not the same, obviously, but it is certainly good in its own way.

Making new traditions can be nice, though, even if it's hard to give up that bit of your childhood. This year and last I've spent the night with friends before Christmas (last year it was Christmas eve, this year the eve of Christmas eve). Last year it was full of watching Nightmare Before Christmas, or at least part of it, before we fell asleep in the fort we made in the living room, and ice cream for breakfast.


This year was a little less childish. I woke up early to make the cinnamon roll dough, so that there was time for it to rise while everyone else was still sleeping. I listened to the This American Life Christmas special from a few years ago. I sipped breakfast tea, enjoying. I noticed the early morning winter light, somehow glad to be up before eight on a vacation day. Slowly my friends arose from their slumbers and joined me in waiting for the dough to rise.


Soon I was rolling out the dough, using my fingers to cover it with butter, while C.T. sprinkled the brown sugar-cinnamon combo over it. I kept getting giddy during the process, exclaiming, I'm making cinnamon rolls! (The novelty of baking has still not rubbed off, obviously.) Then there was nothing left but to wait for the rolls to rise a second time before popping them in the oven.


It was a way to carry a piece of my childhood into the burgeoning traditions of my adulthood. It's true, my mother may not have made cinnamon rolls from scratch - but they were still delicious and they were still a tradition that brought us closer together as a family. More than the ingredients, it was the love that mattered, and this is what I'm trying to bring forward into my life now.

I may have gotten up before eight on a holiday, and I may have burned myself pulling the buns out of the oven, but it was worth it. It was worth it because at the end, I had a table full of happy friends gobbling down cinnamon rolls. (Granted, I had to manuever eating my own rolls with an ice pack on my right hand, but luckily said happy friends were sweet to me, getting me more when required.) The cinnamon rolls were the focus, but really, I think it was the love behind them that was important.

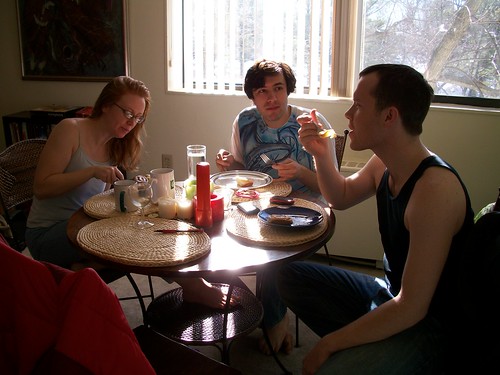
Don't get me wrong, though, these cinnamon rolls were delicious. These three couldn't even wait for me to finish serving before digging in!


Cinnamon Rolls
adapted from Bon Appetit

DOUGH
1 cup milk
3 tbsp butter
3 1/2 cup all-purpose flour
1/2 cup sugar
1 egg
1 packet active dry yeast
1 tsp salt

FILLING
3/4 cup brown sugar
2 tbsp cinnamon
1/4 cup butter, room temp.

Melt the butter for the dough and mix it with the milk. In a large bowl, add a cup of flour, and the sugar, egg, yeast, and salt. Mix well, until all elements are combined. Add the rest of the flour until incorporated into the dough. It should start to pull away from the bowl. Turn the dough out onto a floured surface and knead until smooth. If the dough feels sticky, sprinkle some flour onto it.

When you're done kneading, put just a splash of oil into a bowl, enough to very lightly cover the dough. (I used olive oil, since that's what was available, but since you're using only a very small amount, I don't think it matters too greatly what kind of oil you use.) Cover the bowl and let rise until doubled in volume. This took about an hour and a half for me, but depending on your surroundings, it could be a little less or a little more.

Mix only the brown sugar and cinnamon in a small bowl. Grease some pans to put the rolls in.

Punch down the dough and move it to a flat, floured workspace. Roll it out and smear the butter all over the dough, following that with sprinkling the cinnamon-sugar mixture on top. Start to roll with the long side, making sure to keep it even. When it's all rolled up, cut the dough into segments. (If you're like me, the very ends will only have a little mixture, if any - you can throw these out, or take whatever mixture spills out of the others and sprinkle it on top and bake them, too.) Place the rolls onto the greased pans.

Let the rolls rise until about doubled in volume again - it might be a little harder to tell, but this should take about 40 minutes. Preheat the oven to 375F. When the rolls have risen, bake for 20 minutes. Let cool for as long as you can stand it, or as long as your friends will let you. Warning: it probably won't be long.

Vanilla Icing

3 tbsp milk
1 1/4 cup confectioner's sugar
1/2 tsp vanilla

Whisk the ingredients together until a creamy icing starts to form. You may need to add a little more milk or sugar, depending on the consistency you want.

12.16.2009

the last holiday cookie post

I used to be a picky eater. I'm sure I've mentioned this here before, because it's part of what makes this whole me-cooking-phenomenon so crazy. Luckily, I am also pretty polite, which is what finally started to force me out of that habit. I would be invited over to someone's house and it's not like I could refuse to eat what they served. That would be rude.

This was tested, of course, in Italy - where we wound up eating things like wild boar, hunted in Naples. I ate a lot of meat in Italy, actually, which is especially funny coming up on the two-year anniversary of becoming a for-realsies vegetarian. (My whole life I have been mostly-vegetarian. See above, re: picky eater. In addition to the moral issues with meat, I really just don't like the taste of it.)


Anyway, that's neither here nor there.

Oats were one of those foods I was picky about. To be blunt: I did not like oats. Oatmeal? Yuck. Granola? Pushing it. Oatmeal cookies? No, thank you. Clearly I came to love granola - another victory that can probably be chalked up to living in Italy, though I'm sure it also has to do with needing to rely on the granola in the cafeteria when there was nothing else to eat. Ah, college.


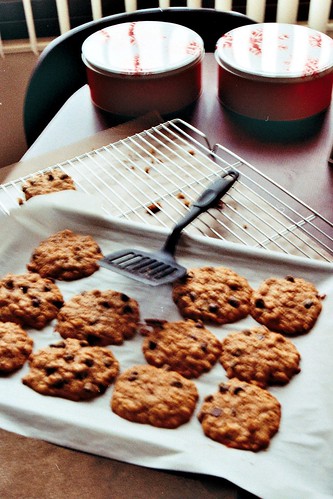
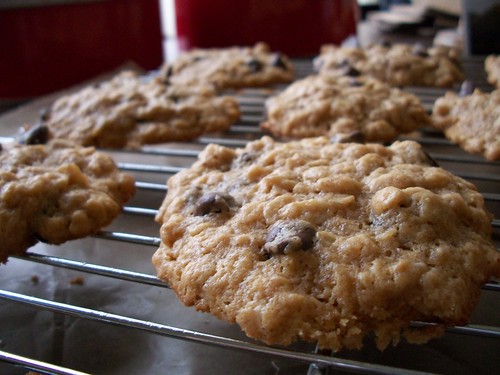
But oatmeal still kind of grosses me out, and by association, I can't remember the last time I had an oatmeal cookies. Until I decided to make them for my holiday tins. I realize this seems crazy. These were certainly not my favorite cookies, but I think they have made me reconsider oatmeal cookies.

Peanut Butter Oat Cookies

adapted from here

The original recipe calls for about 1/2 cup of the oats to be ground, in a food processor. I don't have one of those, so I winged it and just threw them in whole. It seems to have worked out. But if you have a food processor and would like to grind some oats, have at it!

3/4 cup peanut butter
4 tbsp butter
1 tbsp honey
1/2 cup sugar
1 tsp vanilla
1/2 tsp salt
1 tsp baking powder
2 eggs (room temp.)
1 1/4 cup rolled oats
3/4 cup chocolate chips

Preheat oven to 350°F.

Mix together peanut butter, butter, honey, sugar, vanilla, salt, and baking powder. If you're using a mixer, this should only take a couple of minutes. I, however, hand-mixed and it might have taken a little bit longer (though not much). Add in the eggs one at a time, making sure to beat well after each addition.

Fold in the oats, followed by the chocolate chips.

Place the dough in about-tablespoon-sized drops onto a baking sheet. Bake for 10 minutes, rotating the sheet halfway through.

Let cool, and enjoy!

12.08.2009

this legacy of baked goods

This past Sunday, four of us gathered for the third Friendsgiving - the smallest group yet, but possibly the best Friendsgiving. (I mean, we went to the playground and had a snowball fight. You can't get much better than that, right? Exactly.) There was tofurky, mashed potatoes, green beans, a squash/cranberry dish with brown sugar, and pumpkin cheesecake. Not to mention the cookies and wine I brought because I was afraid the cheesecake didn't turn out. (It did.)


None of that is what I am here to talk about.

Yesterday I received in the mail a note from my grandmother, thanking me for thinking of them and sending a tin of baked goods. She mentioned that she doesn't herself bake so much anymore, and it struck me just how much things change. I never would have thought that I would be the one to carry on this legacy of baked goods, and yet here I am, baking and writing about it every week.


As I mentioned last week, I also gave bags of treats to my friends - because honestly, what was I going to do with all those cookies? Even if I wanted to eat all of them, they would have gone stale before I got to half of them. (Of course, despite this, I have made two additional batches of those cookies. They're so good.) These three friends all happened to be at Friendsgiving (funny, that) and maybe some mention of chocolate peanut butter cups came up.

Later, though, in discussing why on earth someone would have a thermometer for making taffy, I brought up the fact that it could be used for other candy-making endeavors, as well. This earned a "but who makes candy at home?"


To which I slowly raised my hand.

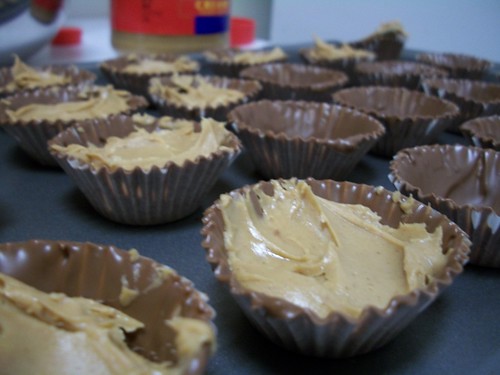
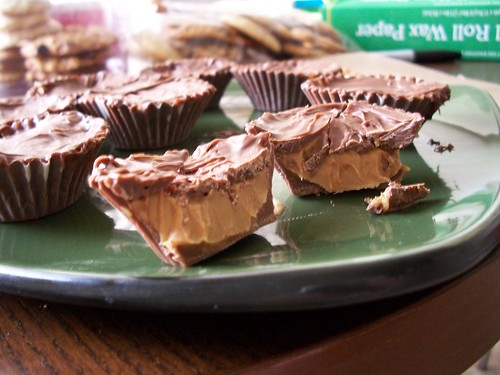
Chocolate Peanut Butter Cups
adapted from here

I didn't keep very good track of how many cups I was making, and so the peanut butter is what the original recipe calls for. I certainly did not measure out the peanut butter, rather just scooping it into the cups. Also, I went through a lot of peanut butter over the Thanksgiving holiday, making all these treats, so I really have no idea how much I used for these alone. Use your best judgment.

12 oz. milk chocolate chips
1/2 cup peanut butter

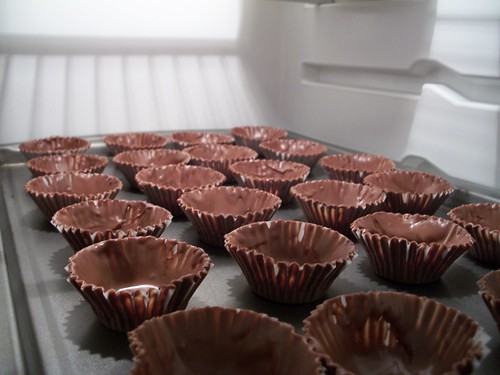
Melt the chocolate down - you can do this in a microwave, obviously, but since I lack that particular appliance, I used a bowl set over simmering water. Using a small spoon, or a tiny pastry brush if you have one, cover the insides of miniature baking cups. (Remember you will need the rest of the chocolate to seal the cups later. Don't use all of it now!) Place in the refridgerator to chill. Depending on the temperature of your fridge, this should take about 20 minutes.

Fill the now-firm cups with peanut butter and cover with the remaining chocolate. Place back in the fridge to chill - again, this should take around 20 minutes, depending on your fridge. The chocolate should be firm.

12.02.2009

practically a saint

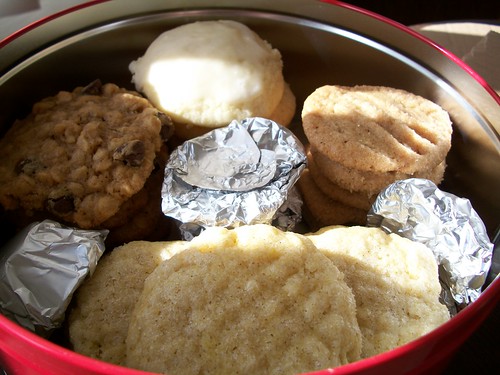
On Thanksgiving, while everyone ate big meals with their families, I baked - for my family, yes, but not with them. Five types of sweets and a couple cups of sugar and peanut butter later, my mother and grandmother have received the first Christmas tins I have ever sent. (Yes, I realize that it is only the first days of December. What can I say, I got the idea in my head and couldn't wait.)


It's hard to say exactly how this idea came about, where it came from. All I can say is that one day, it was there, and it refused to go away. Thanksgiving, the idea said, what better day to spend baking? So I collected recipes - some that have been written about here already, sugar cookies and peanut butter cookies - and some that I had been wanting to try for a while. I made a big trip to the supermarket. I made index cards of the recipes so I wouldn't have to haul my laptop into the kitchen.

And then, on Thanksgiving, I made four different kinds of cookies. I started baking early in the afternoon, armed with all my ingredients, my fairly-new baking rack, and - my saving grace - parchment paper. (Seriously. I already had to do some dishes between each batch, but at least I didn't have to rewash my cookie sheet each time! ...Possibly I should get another baking sheet, yes.) By about 5 or 6 o'clock, I was kind of done with cookies. One more, I decided, and the final treat I'll save for tomorrow.


Thank goodness I did. That final batch of cookies was to be my pièce de résistance, the star of the bunch. I tried one. Then another. If I may say so myself, they were kind of amazing. Somehow I managed to part with them, putting them in tins for my mother and grandmother, even saving some for my friends. (I know. I am practically a saint.)

Daniel pretty much instantly declared them the best of the goodie bag and when I spoke to my mother after she received her batch on Monday, she said they were the clear winner, though she took care to mention the other ones were good, too. Over the weekend, tins sent and bags given out, I kept eyeing the one bag I had yet to give away and knew what had to be done.


...so I made another batch on Sunday.

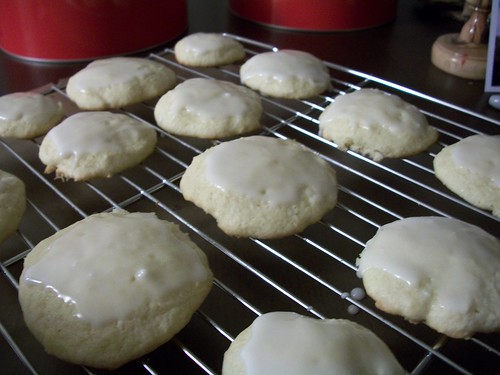
Buttermilk Cookies with Lemon Zest
adapted from Orangette

These are pretty much the perfect cookie, for me. They're sweet but not cloying, the sort of tender and delicate cookie that leads you to eat perhaps too many of them. Really. Just make these. You won't be sorry.

for the dough:
1/2 cup all-purpose flour
1 tsp lemon zest
1 tsp baking powder
1/4 tsp salt
6 tbsp unsalted butter, room temp.
3/4 cup sugar
1 medium-to-large egg*
1/2 tsp vanilla extract
1/3 cup well-shaken buttermilk

for the glaze:
3/4 cup confectioners sugar
1 1/2 tbsp well-shaken buttermilk
1/4 tsp vanilla extract

* I got my eggs from the farmer's market, and they're labeled 'medium' - I just used one of the larger ones.

Preheat oven to 350°F.

Whisk flour, lemon zest, baking powder and salt in a medium bowl. In a large bowl, mash the butter until it smears easily. (I like to use a wooden spoon because of the control it gives me. You can try an electric mixer if you like!) Add sugar and cream the two together. Add in the egg and beat well. Add vanilla, repeat. Mix in a third of the flour mixture, then about half the buttermilk, flour, buttermilk, flour. Be sure to incorporate each well before adding the next step.

Place the dough in drops on the baking sheet. Bake for about 15 minutes.

While the cookies are baking, prepare the glaze by whisking together confectioners sugar, buttermilk, and vanilla. The original recipe calls for sifted confectioners sugar - I tried it sifted and unsifted and there wasn't too much of a difference, though sifting is kind of fun. Make sure there aren't any lumps of sugar, though, in the finished product.

Let the cookies cool on the sheet for a little bit, then transfer to a wire rack if you have one. Brush (or spoon) the glaze onto the warm cookies. Wait until the glaze has set, then enjoy!

10.26.2009

favorites

Fall is my favorite season (if you couldn't tell by that last post) - every year it brings a welcome reprieve from the oppressive heat of summer. Fall and winter were the main reasons I couldn't make it in Florida; I don't do well in heat. Especially not Florida heat, which is humid but which also never really leaves. The joke is that there are two seasons in Florida - hurricane season and not.

Besides the cooler weather, though, fall has the added benefit of being the season wherein many of my favorite activities take place. Mostly I mean Halloween, which is hands down my favorite holiday. Even lackluster Halloweens are still great - the time two years ago when it was on a Wednesday and my dear roommate Becca and I dressed up to go to Buddhist meditation stands out. (Though really, any time you get to dress up and go out in public is a-okay by me.)


It's also the season of pumpkins - which means the season of my favorite beer (pumpkin ale) and my favorite pie (pumpkin, obviously). I honestly did not realize I liked pumpkin so much until this year, actually. Apparently I'm really into it. You can probably guess what this recipe is going to involve.


One of the main reasons I started this blog was because I hated my job so much. There were no real upsides to that job, other than that it did pay me. It slowly got worse and worse, and then luckily I managed to escape. But it did give me one thing - every month a company newsletter was sent out and every month I read it, not because I really cared what was going on in the company, but because I was so eager for something to do that wasn't work. (Or, because I had nothing to do and needed to look busy, else be sent to the file room. Oh, that wretched file room...) There were, however, also recipes in those newsletters. Most of them weren't great - or not appropriate for a vegetarian - but one grabbed my eye what must have been a year ago.


Pumpkin Cheesecake

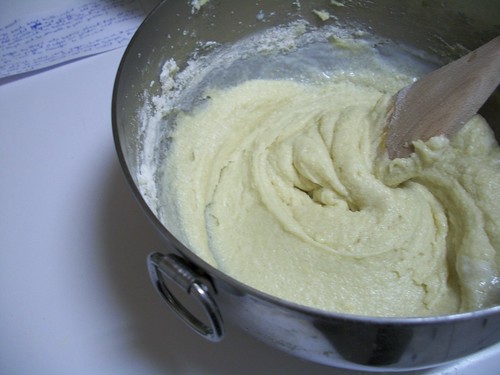
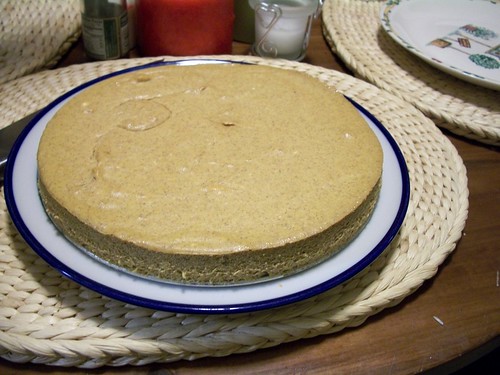
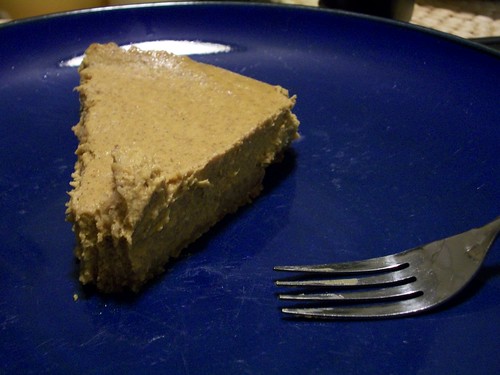
That's right. It's like combining my two favorite desserts: pumpkin pie and cheesecake. I'm pretty sure that's a no-fail right there. I was a little surprised at how easy it was to make cheesecake, too. Because of the pumpkin addition, it feels a little healthier to eat than regular cheesecake.

filling:
16 oz. cream cheese, room temp.
3/4 cup sugar
15 oz. can pumpkin
1 1/4 tsp cinnamon
1/4 tsp ginger
1/2 tsp pumpkin pie spice
1/4 tsp salt
2 eggs

crust:
1 cup graham cracker crumbs
1 tbsp sugar
4 tbsp butter, melted

Combine the ingredients for the crust and spread over the bottom of a 9 inch springform pan. Let chill in the refrigerator.

Preheat oven to 350°F.

Beat the cream cheese and sugar together until blended. Mix in pumpkin, spices, and salt. Add in the eggs, one at a time, beating well after each addition. Pour over the crust in the springform. Bake for 50 minutes.

Chill for as long as you can stand it (overnight is best).

10.20.2009

den of vipers

I entered college with a pretty firm idea of what I planned to do there: I would major in English and International Studies, and then go into government, making change from the inside. Needless to say, things did not exactly go according to plan.

Within a few days of my first semester, before the first class had even met, I dropped my International Relations course because the book was too expensive. I discovered the Buddhist meditation group, met Eric, and the following semester I took a class he taught called "Oracles, Augury, & Divination." There was no turning back after that: I was a Religious Studies major. It wormed its way into my heart quickly; looking back, it makes perfect sense, since I was the sort of child who read encyclopedia entries on different religions for fun. (True story.)


At the end of every semester, there was a department party. I don't remember a lot of details - like the first one I went to, for instance - but what shines through is a feeling of belonging, of togetherness, of home. I remember attending one at John's house before he retired, driving with two dear friends only a few weeks after I had been dumped. I remember winter parties at Eric's on-campus faculty housing, hot mulled cider ladled out into mugs. I remember being a senior myself and finding myself surprised that I had to make a speech with the other seniors. I remember crying at the end of my speech, and getting blamed later for setting the trend.

However, there was also the baked brie. I can't tell you how popular this stuff was, except to say that when the dish was brought out, we all promptly stopped socializing with each other to shove our faces full of this cheese. Suddenly we would be ravenous.

I made this for one of Josh's potlucks, before this cooking thing really sunk in - though a step up from all the college potlucks I went to, where my offering was usually boxed macaroni and cheese (I know, I know). The technique works well with camembert, too; we used butter and almonds for that one.


Baked Brie á l'Eric

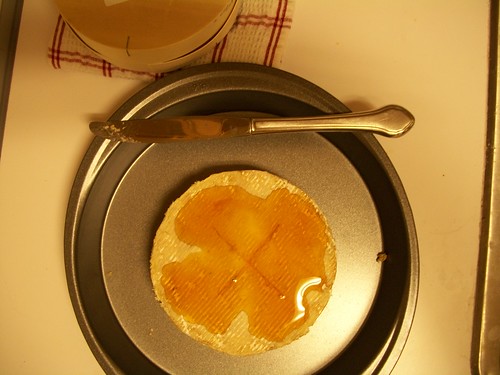
Best served with a crusty bread, a baguette. I'm not sure if this is exactly how it was made for those department parties, but it's still pretty tasty. Also, my pictures are a little deceiving - I didn't quite get all the rind off, because I was in a hurry. It's not a big deal, since the rind is edible, but still. Luckily this - like most everything else I post here - is pretty easy.

wheel of brie
maple syrup

Pre-heat oven to 325°F. Scrape the rind off the top of the brie and cut a cross (or an X, or a T, you get the idea) into it. Pour maple syrup on it. Bake for approximately 10 minutes.

10.13.2009

first-year friendships

My first year at college I made friends mostly with people who lived in the same place as I did. Our hall, a stretch of ten or twelve doubles, all got along fairly well (with a couple exceptions, obviously). The room I shared became much more than a double - people came and went as they pleased, whether my roommate and I were there or not, often. (We once came back from a concert to a room full of our friends, which was equal parts charming and frustrating.) Doors were rarely locked.

I don't really keep in touch with a lot of those people anymore; as is the case with many first-year friendships, they shifted and slowly grew apart, and I found myself in a different group of friends. But I still have a lot of fond memories from that first year of college - sitting in the common room waiting for election results to come in (this was 2004, so the results themselves were not pleasant), our first gender-bending Coming Out Ball, middle of the night trips to Steak 'N' Shake, and Christmas.


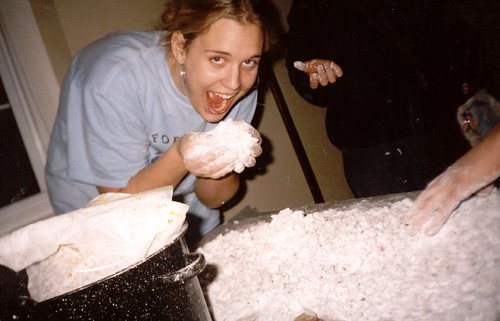
My roommate (pictured above) and I went all out: we hung mistletoe in our room (though it inspired more laughing than kisses), we got little presents for the four main inhabitants of room 213 (besides us, who were the actual residents of the room), and - most relevant to this blog - we made puppy chow for our male friends in the hall.

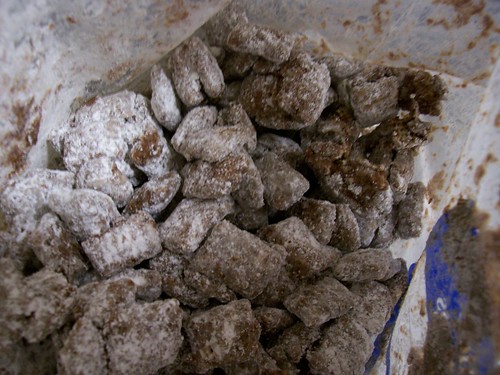
We did not do the latter by ourselves; instead, a bunch of us took over our floor kitchen until it resembled a meth lab. (Seriously, check out all that powdered sugar. It was crazy!) I had never heard of puppy chow before then, but quickly became a fiend for it. Aside from making small bags for our friends, we deigned it necessary to have a somewhat larger bag to stash in our room.


(sorry, this stuff is delicious, but not very photogenic)

Granted, it is a little early for Christmas goodies, but you know, Halloween is approaching and perhaps this would be a good treat for the wee tricksters? Okay, okay, mostly I just wanted to have some puppy chow myself and am now making excuses. It is never too early for holiday treats! Yeah!

Puppy Chow

So, this is kind of an approximate recipe. I might use a little less chocolate next time - or maybe not. I forgot how addictive this stuff is. Maybe it is best to wait for the holidays? (Another reason I like cooking for people, and not just me.)

1/2 cup peanut butter
1/4 cup butter
1 cup chocolate chips
1/2 tsp vanilla extract
2/3 box Chex (or similar cereal, I used the Safeway brand)
1 cup powdered sugar

Melt chocolate, peanut butter, and butter together - either in the microwave, or over the stove.
Mix in the vanilla extract. Add cereal and stir to cover all the pieces.
Transfer to a large freezer bag. Add powdered sugar. Toss to mix.

9.22.2009

eleventh hour

It was another one of those weekends where I had a lot of time to myself, where mostly my company were some kittens and Doctor Who (why yes, I am kind of in love with David Tennant, ok). Naturally, you would think I would be baking, right? I mean, this is what I thought, at least. After all, my hiatus is over, it is high time to get myself back in the kitchen and making things.


I didn't bake a thing all weekend.

To be fair, my meals weren't especially complicated, either. And, uh, there was a fair amount of eating out (I can never refuse Amsterdam Falafel - it really is the best, you should go eat there now, if you can). What I am saying to you is that last night I wound up nervously awaiting the ding of the kitchen timer, hoping my little experiment would turn out.


I am happy to report it did.

Which is lucky, because I need to stock up on kitchen essentials (like flour), so there wasn't really a second chance option. And heaven forbid I don't bring anything to the blog on Tuesday! Let me tell you, dear reader, in this post-collegiate world of mine, I have come to appreciate deadlines more. So even though this deadline is my own creation, it's still helpful.

And this experiment of mine? Well, let me just show you...


Lemon-Sugar Cookies
Adapted from Joy of Cooking

I tried to come up with a name for these delicately lemon-flavored cookies, but nothing came. Well, that's not entirely true, but after my brain suggested "lemon drop" I decided to just give up. Simpler is better, right?

1 1/4 cup all-purpose flour
1/2 tsp baking powder (generous)
1/2 tsp salt
3 dashes ground cinnamon
1/2 cup sugar
just under 1/2 cup vegetable oil
1 large egg
1/2 tsp vanilla
lemon zest

Preheat oven to 375°F.

Stir together the flour, baking powder, salt, and cinnamon. Add in the sugar and the vegetable oil, mix to combine. Beat in the egg and add vanilla. Start with about 1/2 tbsp lemon zest. Stir in well. Add more to taste (I added a lot, but I really wanted that lemon flavor).

Shape dough into balls and roll in sugar. Place on cookie sheet and bake for about 10 minutes. Let cool. Enjoy!

8.24.2009

determination

I realized Sunday night that I had no idea what to write for today - I didn't do a whole lot of cooking this past week. I did, however, get the first results of my Holga 110 experiments back, maybe a post on that? I know, I know, I pretty much just declared this solely a food blog, and yet...


That won't do.

So, Monday evening, I looked through my kitchen and found a lot of disparate ingredients leftover from other cooking endeavors. I thought, ah, maybe I'll try and do some sort of salsa with the jalapenos I have - but alas! they are no good. My next idea: well, I'll just make dinner. Peanut sauce and rice noodles, snapped some pictures, ate my dinner, and kept looking at the cake recipe sitting in one of my firefox tabs. Oh, boy.


Last Tuesday, after yoga, I was determined to make a cake. Molly's winning-hearts-and-minds cake, to be precise. There were a whole slew birthdays coming up, and I decided this cake would be perfect for these events. The only problem is, I get back from yoga at eleven at night, which doesn't exactly make for a prime baking situation, as it turns out. It was nearing one when I let the cake cool and discovered - while turning it out of the pan to freeze - it was still a little too gooey in the middle. I sighed, wrapped it in tin foil, and threw it in my freezer anyway. It's still there.


But a cake called to me. I knew I wanted to make a cake - maybe to prove to myself that I could. I knew I wouldn't be satisfied unless I made the cake. Even though I failed before, even though I had no need for a cake in my apartment, what with the batch of cookies I had made on Sunday. Still. Cake. So I trucked over to the Safeway, picked up butter, and set to making a cake, thinking how much my feminism has changed over the years. I used to think that domesticity was the antithesis of feminism - and even though I (thankfully) grew out of that mindset, even a year ago I would have told you Cooking Is Not For Me.

Clearly, a lot has changed.


There's no recipe here, because I pretty much followed this one to the tee. The only adaptation I made was using a pinch or two of cinnamon instead of nutmeg, because that's what I had in my cupboard. I also, uh, hand-mixed with a wooden spoon. Definitely a shoulder workout, definitely therapeutic. (More and more I am choosing the old ways. More than ever I understand that feminism is about choice.)