
Before I get to the heart of this post, I'd like to mention that this is my fiftieth post here and thank all of you readers for following along in my adventures in the kitchen. Yay!
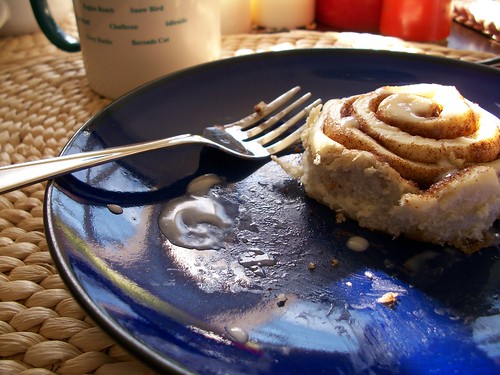
One of the hardest things about growing up, especially during the holidays, is negotiating what to carry with you from childhood and what to make anew. This is the second year I've spent Christmas away from my family - and I've been lucky enough to have my friend's family to take me in for the holidays. It's not the same, obviously, but it is certainly good in its own way.
Making new traditions can be nice, though, even if it's hard to give up that bit of your childhood. This year and last I've spent the night with friends before Christmas (last year it was Christmas eve, this year the eve of Christmas eve). Last year it was full of watching Nightmare Before Christmas, or at least part of it, before we fell asleep in the fort we made in the living room, and ice cream for breakfast.
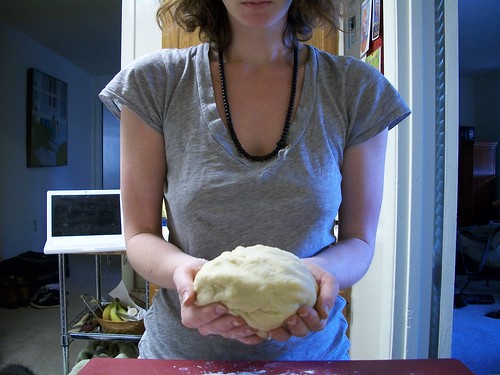
This year was a little less childish. I woke up early to make the cinnamon roll dough, so that there was time for it to rise while everyone else was still sleeping. I listened to the This American Life Christmas special from a few years ago. I sipped breakfast tea, enjoying. I noticed the early morning winter light, somehow glad to be up before eight on a vacation day. Slowly my friends arose from their slumbers and joined me in waiting for the dough to rise.
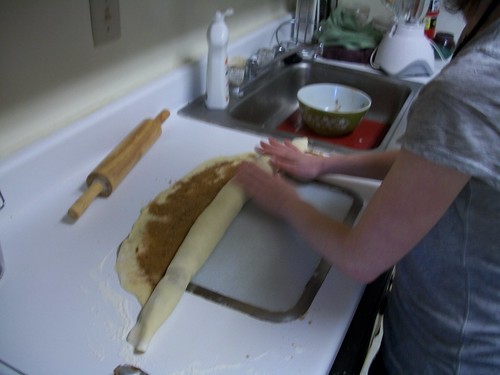
Soon I was rolling out the dough, using my fingers to cover it with butter, while C.T. sprinkled the brown sugar-cinnamon combo over it. I kept getting giddy during the process, exclaiming, I'm making cinnamon rolls! (The novelty of baking has still not rubbed off, obviously.) Then there was nothing left but to wait for the rolls to rise a second time before popping them in the oven.

It was a way to carry a piece of my childhood into the burgeoning traditions of my adulthood. It's true, my mother may not have made cinnamon rolls from scratch - but they were still delicious and they were still a tradition that brought us closer together as a family. More than the ingredients, it was the love that mattered, and this is what I'm trying to bring forward into my life now.
I may have gotten up before eight on a holiday, and I may have burned myself pulling the buns out of the oven, but it was worth it. It was worth it because at the end, I had a table full of happy friends gobbling down cinnamon rolls. (Granted, I had to manuever eating my own rolls with an ice pack on my right hand, but luckily said happy friends were sweet to me, getting me more when required.) The cinnamon rolls were the focus, but really, I think it was the love behind them that was important.
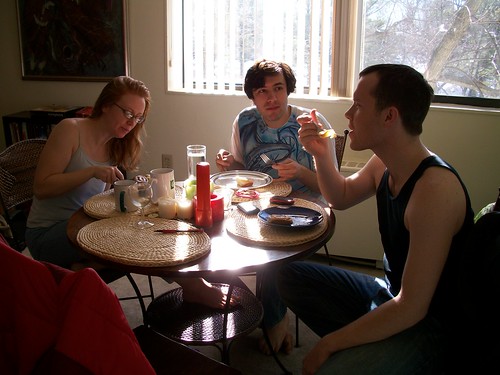
Don't get me wrong, though, these cinnamon rolls were delicious. These three couldn't even wait for me to finish serving before digging in!
Cinnamon Rolls
adapted from Bon Appetit
DOUGH
1 cup milk
3 tbsp butter
3 1/2 cup all-purpose flour
1/2 cup sugar
1 egg
1 packet active dry yeast
1 tsp salt
FILLING
3/4 cup brown sugar
2 tbsp cinnamon
1/4 cup butter, room temp.
Melt the butter for the dough and mix it with the milk. In a large bowl, add a cup of flour, and the sugar, egg, yeast, and salt. Mix well, until all elements are combined. Add the rest of the flour until incorporated into the dough. It should start to pull away from the bowl. Turn the dough out onto a floured surface and knead until smooth. If the dough feels sticky, sprinkle some flour onto it.
When you're done kneading, put just a splash of oil into a bowl, enough to very lightly cover the dough. (I used olive oil, since that's what was available, but since you're using only a very small amount, I don't think it matters too greatly what kind of oil you use.) Cover the bowl and let rise until doubled in volume. This took about an hour and a half for me, but depending on your surroundings, it could be a little less or a little more.
Mix only the brown sugar and cinnamon in a small bowl. Grease some pans to put the rolls in.
Punch down the dough and move it to a flat, floured workspace. Roll it out and smear the butter all over the dough, following that with sprinkling the cinnamon-sugar mixture on top. Start to roll with the long side, making sure to keep it even. When it's all rolled up, cut the dough into segments. (If you're like me, the very ends will only have a little mixture, if any - you can throw these out, or take whatever mixture spills out of the others and sprinkle it on top and bake them, too.) Place the rolls onto the greased pans.
Let the rolls rise until about doubled in volume again - it might be a little harder to tell, but this should take about 40 minutes. Preheat the oven to 375F. When the rolls have risen, bake for 20 minutes. Let cool for as long as you can stand it, or as long as your friends will let you. Warning: it probably won't be long.
Vanilla Icing
3 tbsp milk
1 1/4 cup confectioner's sugar
1/2 tsp vanilla
Whisk the ingredients together until a creamy icing starts to form. You may need to add a little more milk or sugar, depending on the consistency you want.
One of the hardest things about growing up, especially during the holidays, is negotiating what to carry with you from childhood and what to make anew. This is the second year I've spent Christmas away from my family - and I've been lucky enough to have my friend's family to take me in for the holidays. It's not the same, obviously, but it is certainly good in its own way.
Making new traditions can be nice, though, even if it's hard to give up that bit of your childhood. This year and last I've spent the night with friends before Christmas (last year it was Christmas eve, this year the eve of Christmas eve). Last year it was full of watching Nightmare Before Christmas, or at least part of it, before we fell asleep in the fort we made in the living room, and ice cream for breakfast.
This year was a little less childish. I woke up early to make the cinnamon roll dough, so that there was time for it to rise while everyone else was still sleeping. I listened to the This American Life Christmas special from a few years ago. I sipped breakfast tea, enjoying. I noticed the early morning winter light, somehow glad to be up before eight on a vacation day. Slowly my friends arose from their slumbers and joined me in waiting for the dough to rise.
Soon I was rolling out the dough, using my fingers to cover it with butter, while C.T. sprinkled the brown sugar-cinnamon combo over it. I kept getting giddy during the process, exclaiming, I'm making cinnamon rolls! (The novelty of baking has still not rubbed off, obviously.) Then there was nothing left but to wait for the rolls to rise a second time before popping them in the oven.
It was a way to carry a piece of my childhood into the burgeoning traditions of my adulthood. It's true, my mother may not have made cinnamon rolls from scratch - but they were still delicious and they were still a tradition that brought us closer together as a family. More than the ingredients, it was the love that mattered, and this is what I'm trying to bring forward into my life now.
I may have gotten up before eight on a holiday, and I may have burned myself pulling the buns out of the oven, but it was worth it. It was worth it because at the end, I had a table full of happy friends gobbling down cinnamon rolls. (Granted, I had to manuever eating my own rolls with an ice pack on my right hand, but luckily said happy friends were sweet to me, getting me more when required.) The cinnamon rolls were the focus, but really, I think it was the love behind them that was important.
Don't get me wrong, though, these cinnamon rolls were delicious. These three couldn't even wait for me to finish serving before digging in!
Cinnamon Rolls
adapted from Bon Appetit
DOUGH
1 cup milk
3 tbsp butter
3 1/2 cup all-purpose flour
1/2 cup sugar
1 egg
1 packet active dry yeast
1 tsp salt
FILLING
3/4 cup brown sugar
2 tbsp cinnamon
1/4 cup butter, room temp.
Melt the butter for the dough and mix it with the milk. In a large bowl, add a cup of flour, and the sugar, egg, yeast, and salt. Mix well, until all elements are combined. Add the rest of the flour until incorporated into the dough. It should start to pull away from the bowl. Turn the dough out onto a floured surface and knead until smooth. If the dough feels sticky, sprinkle some flour onto it.
When you're done kneading, put just a splash of oil into a bowl, enough to very lightly cover the dough. (I used olive oil, since that's what was available, but since you're using only a very small amount, I don't think it matters too greatly what kind of oil you use.) Cover the bowl and let rise until doubled in volume. This took about an hour and a half for me, but depending on your surroundings, it could be a little less or a little more.
Mix only the brown sugar and cinnamon in a small bowl. Grease some pans to put the rolls in.
Punch down the dough and move it to a flat, floured workspace. Roll it out and smear the butter all over the dough, following that with sprinkling the cinnamon-sugar mixture on top. Start to roll with the long side, making sure to keep it even. When it's all rolled up, cut the dough into segments. (If you're like me, the very ends will only have a little mixture, if any - you can throw these out, or take whatever mixture spills out of the others and sprinkle it on top and bake them, too.) Place the rolls onto the greased pans.
Let the rolls rise until about doubled in volume again - it might be a little harder to tell, but this should take about 40 minutes. Preheat the oven to 375F. When the rolls have risen, bake for 20 minutes. Let cool for as long as you can stand it, or as long as your friends will let you. Warning: it probably won't be long.
Vanilla Icing
3 tbsp milk
1 1/4 cup confectioner's sugar
1/2 tsp vanilla
Whisk the ingredients together until a creamy icing starts to form. You may need to add a little more milk or sugar, depending on the consistency you want.










 Posts
Posts

